One Of The Staples Of Life Of Yesteryear Was A Porch And A Porch Swing. Many An Evening Was Spent After Supper In The Swing Chatting And Just Relaxing

Well, A Lot Of Us Have More Modern Houses And No Front Porches.. But, We Do Have Decks And Many Decks Are Partially Covered..
This Being Said, We Can Build A Swing For The Covered Part Of The Deck And Build It For Around $100 Or Less.
That Beats Buying One For Around $500.00 Plus You Get Some Great Shop Time As Well.
Let’s Mosey Into The Shop On Page 2 And Gather The Materials Needed :
Here Is A List Of What Materials You Will Need To Put This Together
Materials Needed:
- 2×4 board – 105″ length (x 5)
- 1×4 board – 96″ length (x 5)
- 1×2 board – 96″ length (x 10)
- 3″ exterior screws (x 44 screws – buy a 1 lb box)
- 1 5/8″ exterior screws (x 106 screws – buy a 1 lb box)
- Wood glue
- 1/4″ Eye bolts, 3″ long (x 4)
- Corresponding nuts and washers for the 1/4″ eye bolts
- Large screw eye (x 2)
- 1/8″ Quick Links (x 8)
- Painter’s tape
- Brown kraft paper or other large paper
-
1/8″ Zinc-plated chain (Two 7 foot sections, and two sections of 18 links. Approx. 18 feet)
And Now For The Tools-Which You Probably Already Have
Tools Needed:
- Jigsaw
- Random orbital sander
- Large C clamp
- Safety glasses
- Circular saw
- Carpenter square
- Electric drill/driver
- Hammer
- Wood chisel
- Sand Paper
- Level
- Pencil
- Measuring tape
- 1/8″ drill bit
- 1/4″ drill bit
- 1/2″ drill bit
- Phillips head drive bit
-
Scissors
- Material And Tool Source : Instructables
- Picture Source : Instructables
Ok, Now That You Have The Necessary Tools And Lumber And Miscellaneous Items Gathered It Is Time To Head To Page 3 To Get Serious About The Assembly
STEP 2:
MEASURE AND CUT BOARDS TO APPROPRIATE LENGTH

Using a pencil, measuring tape, and the carpenter square, mark each board according to the lengths listed below. See the picture for how to mark the cuts to maximize the use of the wood.
- Cut the 2 x 4 boards to the following lengths
- 65″ (x 2)
- 24″ (x 5)
- 25 1/2″ (x 4)
- 11 3/4″ (x 2)
- 52 1/2″ (x 2)
- Cut the 1 x 4 boards to the following lengths
- 22 3/4″ (x 2)
- 24 1/2″ (x 2)
- 25 3/4″ (x 2)
- 26 3/4″ (x 2)
- 27 1/2″ (x 2)
- 28″ (x 4)
- Cut the 1 x 2 boards to the following lengths
- 58 1/2″ (x 10)
TIP: Write the length on each board before cutting, as many of the boards are very close in length. Labeling the length of each board will eliminate confusion later.
When you are done cutting you should have the following boards:
- 5 Swing seat support boards (24 inches long)
- 2 baseboards (65 inches long)
- 2 vertical arm rest support boards (11 3/4 inches long)
- 2 vertical back support boards (25 1/2 inches long)
- 2 horizontal back support boards (52 1/2 inches long)
- 2 arm rest boards (25 1/2 inches long)
- 14 Swing back slats (All the 1 x 4 boards)
- 10 Seat slats (All the 1 x 2 boards)
To avoid confusion, these names will be used to refer to these boards throughout the rest of this Instructable
OK ? With Us So Far ? Good.. Now Over To Page 3 For Some Further Instructions
STEP 3: MARK, CUT THE SUPPORT BOARDS

- Trace one of the swing seat support boards (24 inch long 2x4s) on a piece of kraft paper.
- Using the pictured diagram, draw out the seat support curve and the angled cut for the back of the board on the paper.
- Cut it out with scissors and trace the curve onto each of the five 2x4s.

- Use the jigsaw to cut the curve and the angled cut on each of the five swing seat support boards.
STEP 4: CLAMP THE SWING SUPPORT BOARDS TOGETHER FOR EASIER SANDING ::

-
Line up swing seat support boards using the tip and the bottom back edge.
- Use two thin scraps of wood and a C clamp to clamp the five swing support boards together at the back (angled section) of the board. The scraps of wood keep the C clamp from leaving a mark on the outer 2x4s.
- Using the random orbital sander, sand the swing seat support board curve until there is a uniform curve across all five boards.
- When the curve is even across the five swing seat support boards, move the clamp to the middle section and be sure to sand the back angled edge of the 2x4s smooth as well.
-
Before removing the clamp, number the boards 1-5 from one end to the other. Because they were sanded in that order, the same order will make the most even seat when assembling the swing.
Ok So Far ? Good, Grab A Cold Drink And Take A Break..
Break Is Over Guys, Now Head To The Next Phase–We Are Getting There
STEP 5: MEASURE AND CUT THE VERTICAL BACK BOARDS :


Use two of the 25 1/2″ 2×4 boards for the vertical back support boards.
- From one end of the board, measure and make a mark along one edge at 25 1/16 inches.
- From the same end, but on the other edge of the 2×4, measure and make a mark at 24 1/8 inches.
- Using a carpenter square, draw a line between the two marks. This will result in an angled line across the board.
- Repeat on the second 2×4.
-
With a circular saw, make a cut along this line on both boards and sand the cut ends smooth.
-
STEP 6: MARK THE BOLT HOLES AND SWING SEAT SUPPORT ATTACHMENT POINTS ON BASEBOARD


The two 65″ 2×4 boards are the swing baseboards.
- With a pencil and a carpenter’s square, draw a line 2 1/8 inches from one end of the board.
- Mark the center of each 2×4 (1 3/4 inches from edge) with a line perpendicular to the first line to form a cross.
- Mark this cross on all four ends. It marks the point where a bolt will be attached during the swing assembly to hold the swing chain.
- Starting at one end of the baseboard, use a pencil and a square to draw a line 3 1/4 inches in from one end.
- Then, using that line as the starting point, measure and draw another line at 28 1/2 inches.
- Using that line as the starting point, measure and draw another line at 1 1/2 inches.
- Using this line as the starting point, measure and draw a final line at 28 1/2 inches.
- There should be 3 1/4 inches remaining to the other end of the board.
- Use the carpenter’s square to extend these lines onto the sides of the baseboards. These lines will help when lining up the swing seat support boards when assembling. Repeat with the second baseboard.
TIP: Always measure and mark from one end of the board, not from both, so you don’t end up with a gap if your cuts are slightly off.
Step 7: Mark and cut curved ends of swing baseboards.


-
Placing the end of the ruler in the center of the marked cross, measure and mark at 2 1/8 inches at several points (about 10) to form a curve.
- Connect the dots to draw the curve.
- NOTE: This could also be done with a pencil and string!
-
Mark all four ends in this way, OR, once the first curve is cut using a jigsaw, trace that cut into the other ends and then cut those ends in the same manner.
-
Once all four curves are cut, use the random orbital sander to smooth the edges.
- BREAK TIME — HAVE A COLD ONE AND TAKE A BREAK…
LET’S CONTINUE ON THE NEXT INSTALLMENT ON THE NEXT PAGE
Step 8: Attach swing seat support boards #1, #3 and #5 to rear swing baseboard.


-
Lay swing seat support boards #1, #3 and #5 on the ground, curved side down.
- Line up the outside of support board #1 with the first line on the baseboard, also lining up the back of support board #1 with the back of the baseboard as pictured. (The back is the angled cut!)
- Line up support board #5 in the same way on the opposite end of the baseboard.
- Line up support board #3 with the 1 1/2 inch section marked in the center of the baseboard, again lining up the back of the support boards with the back edge of the baseboard.
- Use the 1/8″ drill bit to pre-drill two evenly spaced holes through the baseboard into the first swing seat support board. Use this same drill bit to pre-drill for all screws used in the assembly of this swing. Pre-drilling helps to ensure that the wood doesn’t split while inserting the screws.
- Use the electric drill/driver with the Philips head driver bit to insert 3 inch exterior screws into each of the pre drilled holes. Make sure all screw heads are flush with the surface of the wood, not sticking out above the surface.
- Repeat for the other two support boards.
- Complete the pre-drilling and inserting screws for each swing seat support board before moving on to the next one.
TIP: If you have TWO drills/drivers, use one for pre-drilling and one for inserting screws.
This will save you a lot of time you would otherwise spend switching your drill bit and driver bit in and out.
Step 9: Attach second baseboard to swing seat support boards #1, #3 and #5.


-
Use measuring tape and carpenter’s square to draw a line on each support board, 13 9/16 inches from the inside edge of the rear baseboard.
- Line up the inside edge of the second baseboard with this line.
- Pre-drill two evenly spaced holes through the baseboard into the first swing seat support board.
- Insert two 3 inch screws into these holes.
-
Repeat for the two remaining swing seat support boards.
Step 10: Attach vertical back support boards.
The two vertical back support boards were cut in Step 5.
- Place the first board flat against the inside of the outer swing seat support board, with the angled cut down against the rear baseboard, the back of the board lining up with the back of the baseboard, and the board slanting up and away from the back of the swing (as pictured).
- Pre-drill three holes through the vertical back support board into the outer swing seat support board. These holes should be positioned as pictured, forming a triangle with two screws on the top and one screw forming the point on the bottom. It is important to attach them in this way so as not to take the chance of hitting the screws coming up from the bottom of the baseboard.
- Once holes are pre-drilled, insert 3 inch screws and tighten until flush with the board. Be careful not to sink these screws too deep, or the tip of the screws will stick out the other side of the swing seat support boards.
-
Repeat with the other vertical back support board on the opposite end of the swing base.
Step 11: Trace and cut out hole in the vertical arm rest support board to prepare for seat slats.

One of the seat slats will run through the vertical arm rest support board, and the hole for that needs to be cut before the arm rest support is attached.
- Place one of the vertical arm rest support boards (11 3/4 inch long 2x4s) upright on the front baseboard, flat against the inside of one of the outer swing seat support boards.
- Make a mark at the center of the vertical arm rest support (1 3/4 inches) on the outside of the board, just above the curve of the swing seat support board.
- Trace the curve of the swing seat support onto the vertical arm rest support.
- Next, line up the end of one of the seat slats with the traced curve and center it on the center mark. Then trace the outer edge of the end of the slat onto the vertical arm rest support. This will look roughly like a rectangle.
- Using a 1/2 inch drill bit, drill a hole through the center of the traced rectangle.
- Then, using a jigsaw, completely cut out the rest of the rectangular piece.
- Roll up a small piece of sandpaper and use it to smooth the edges of the hole.
- Repeat with the other vertical arm rest support board.
Before moving on to the next step, make sure you can slide a seat slat easily through the hole while holding the vertical arm rest support in place against the swing seat support board.
***As you can see in the picture, I tried to do this step much later in the swing assembly, after the other swing seat support boards and most of the seat slats were attached. This resulted in much removing and reattaching of screws, and I don’t recommend it!
TIME FOR A BREAK ? GO AHEAD AND TAKE ONE.. WE WILL CONTINUE ON THE NEXT PAGE
LET’S CONTINUE FROM WHERE WE TOOK THE LAST BREAK
Step 12: Pre-drill and attach vertical arm rest support boards.

-
Place one of the vertical arm rest support boards upright on the front baseboard, flat against the inside of one of the outer swing seat support boards. Make sure the hole for the seat slat is lined up with the top of the swing seat support.
- Pre-drill two holes through the vertical arm rest support boards into the swing seat support.
TIP: Drill one hole higher and one hole lower (as pictured). The screws for the next swing seat support board that will be attached, will be done opposite to ensure you will not run into any previously inserted screws. You may need to make your spacing wider or more narrow for this first set of screws to avoid hitting the screws coming up from the baseboard.
- Insert 3 inch screws into the pre-drilled holes. Again, be careful not to sink them too deep or the tips of the screws will stick out the other side.
-
Repeat with the other vertical arm rest support board on the other side of the swing.
Step 13: Attach swing seat support boards #2 and #4.

-
Place swing seat support boards #2 and #4 in their respective order, flat against the vertical support boards and with their back edges lined up with the back edge of the rear baseboard.
- Pre-drill three holes through each swing seat support board from the back, inside edge, into the vertical back support boards. These holes should form a triangle, with two holes the bottom and one on the top for the point of the triangle, as pictured.
- Insert 3 inch screws into each of the pre-drilled holes.
- Pre-drill two holes through the front edge of each of the swing seat support boards into the vertical arm rest supports. One hole should be higher and one lower, but make sure to place the holes opposite of the last two screws placed in the vertical arm rest support so as to not hit screws that have already been inserted.
- Insert 3 inch screws into each of these holes.
Swing seat support boards # 2 and #4 will not be attached with screws from the bottom.
Step 14: Mark and cut out arm rests.


-
Use the pictured diagrams to draw the shape of each arm rest (left and right will be opposite) onto the remaining two 25 1/2″ 2×4 boards.
- Remember to make all your measurements from the same side or end of the 2×4.
- Once the arm rest shape is drawn on the 2×4, use the jigsaw to cut along these lines.
TIP: You may draw and cut one arm rest and then trace onto the second 2×4.
Wait to sand this board until after the next step.
Step 15: Cut out slot on underside of arm rests for vertical support. 


-
Lay out arm rests side by side with curved edges facing each other.
- Use the pictured diagram to measure and mark the 3 1/2″ x 1 1/2″ rectangle on each arm rest. Make sure the arm rests look like a mirror image of each other when laid side by side. The slot should be closer to the curved edge on both arm rests.
NOTE: In the second picture, the originally drawn slot is incorrect. If you want to spend a lot of time doing extra wood chiseling and filling the space with an extra bit of wood, go ahead and make that same mistake. 🙂
- Using a wood chisel and hammer, remove the wood inside the marked rectangle down to 3/4 inch deep. Be careful when chiseling near the 1/2 inch edge of the arm rest so as not to split the wood.
- Repeat with the other arm rest.
TIP: Use the square to draw a line 3/4 inch down from the top of the vertical arm rest support board. When you can place the arm rest on the support board and it lines up with this line, you know you’ve chiseled enough.
-
Use the random orbital sander to sand all edges of the arm rests.
I AM READY FOR A REST.. HOW ABOUT YOU ? GOOD.. TAKE A BREAK AND WHEN YOU ARE READY, GO ON TO THE NEXT PAGE
OK .. LET’S BEGIN ANEW :
Step 16: Sand and attach horizontal back support boards.


-
Take the 52 1/2″ 2×4 boards and sand smooth.
- On the back side of the vertical back support boards, measure up from the top of the rear baseboard and draw lines at 5 3/4″ and 20 3/4″.
- Using the square, extend this line onto the inside edge of the vertical back support boards. These marks will line up with the bottom edge of each of the horizontal back supports.
- Tip the swing on its back for this step so it is easier to keep the boards lined up while assembling.
- Place the horizontal back support boards (one at a time) in between the vertical back supports and line up the bottom edge of the board with the marks made on the vertical supports.
- From the outside edge of the vertical back supports, pre-drill two holes, evenly spaced, through the vertical supports and into the horizontal back support boards.
-
Insert 3 inch screws into the pre-drilled holes and make sure the screw head is flush with the wood.
Step 17: Sand seat slats and attach the section of seat slats up to the vertical arm rest support boards.


-
Sand each of the 1×2 boards on all sides.
- Cut two small chunks of wood 3/4 inches wide to use as spacers for placing the seat slats.
- As each slat is added, inspect the board so that the best side of the board (fewest knots and imperfections) can be facing upward.
- Starting at the back of the seat, place the first slat all the way against the vertical back support boards and line it up with both sides of the bench.
- Pre-drill one hole through the seat slat into each swing seat support board (five holes per seat slat) and insert a 1 5/8″ screw into each hole. Insert the screws until just flush with the board.
TIP: If you do insert the screw too far, and the head of the screw is below the surface of the wood, do not remove or unscrew it to make it even. This causes the screw’s hold to be weakened.
- Complete all the pre-drilling and inserting screws for each seat slat before moving on to the next slat.
- After the first slat, place the 3/4 inch spacers between each new slat and the slat before it, near the ends of the boards, to hold the spacing. Then pre-drill and insert screws.
-
Move the spacers to the center (as pictured) when pre-drilling and inserting the screw into the center swing seat support board, as the spacing here tends to get smaller or wider on different parts of the curve.
Step 18: Attach seat slat just to the rear of the vertical arm rest support boards.

The first seat slat touching the vertical arm rest support board will need a notch cut in both ends to keep the correct spacing of the seat slats.
- To measure this notch, make marks as follows.
- Place slat across swing seat support boards and line up with each side of the swing.
- Push the slat up against the vertical arm rest support board and mark the width of the 2×4 on the seat slat where it lines up.
- Using a measuring tape, measure the size of the spacing between this slat and the previous slat (it will be less than 3/4 inch). The extra distance needed to complete the 3/4 inch spacing will be the depth of the notch. (For example, if the spacing is currently at 1/2 inch, an additional 1/4 inch is needed to complete the 3/4 inch spacing, so the notch cut will need to be 1/4 inch deep.)
- Mark this depth on the seat slat.
- Be sure to do this measurement for each end of the seat slat. Because there may be small differences in how boards were attached earlier in the assembly process, these two measurements may not be exactly the same.
- Cut the notch from the seat slat using a jig saw.
- Sand the edges smooth with sandpaper.
-
Using the 3/4 inch spacers to hold the spacing of this seat slat, pre-drill holes and attach with screws to the swing seat support boards in the same manner as the previous seat slats.
Step 19: Attach seat slat that runs through the vertical arm rest support boards.

-
From one side of the swing, slide a seat slat through the rectangular holes cut previously in the arm rest support boards.
- Line the seat slat up with both sides of the swing.
- Pre-drill holes and insert screws in the same manner as the previous seat slats.
-
Remember to use the spacers in the center of the seat slat when attaching the slat to the center swing seat support board.
Step 20: Notch and attach seat slat on front side of vertical arm rest support along with final seat slat.


This seat slat is another that will need a notch cut from it.
- Measure the width of this notch in the same manner as the previous notches (Line the seat slat up with the sides of the swing and mark the width of the vertical arm rest support board on the seat slat).
- Because this slat is at an angle to the vertical arm rest support board as it follows the curve of the swing seat supports, the depth of this notch will be cut differently.
- Using the width guides, cut off the bottom square edge of the slat up to the top edge of the board. Please see the pictures of this notch so that this makes sense!
- Using the 3/4 inch spacers to hold the spacing of this seat slat, pre-drill holes and attach with screws to the swing seat support boards in the same manner as the previous seat slats.
Time for the final seat slat!
- Line up the final seat slat with the front edge of the swing seat support boards.
-
Pre-drill and insert screws. Pre-drilling and inserting of screws will need to be done at a SLIGHT angle so that the screw does not stick out the bottom of the swing seat support board.
Step 21: Sand and attach swing back slats.


-
Sand the 1×4 slats smooth on all sides.
- Use the leftover cut ends from the seat slats as spacers for the bottom spacing of the swing back slats. Hold these spacers in place on top of the rearmost seat slat with painters tape.
- Line up the cut swing back slats according to length with the 22 3/4″ boards on the outside and the four 28″ boards in the middle. The tops should roughly form a curve.
- Keeping the swing on its back, mark the center line of the swing on both horizontal back support boards. Then, mark 3/8 inch on either side of that line. This creates 3/4 in spacing in the center of the swing.
- Line up a 28″ swing back slat on each side of the 3/4 inch space in the center of the swing back.
- Pre-drill two evenly spaced holes through the first swing back slat and into each horizontal back support board. Insert 1 5/8″ screws into each pre-drilled hole. Repeat with the other center swing back slat.
- Working outward on each side, measure 5/8 inch from the edge of each swing back slat and draw lines on each of the horizontal back support boards.
- Line the next swing back slats up with those lines and pre-drill and attach screws in the same manner as the first swing back slats.
- Continue this process with the remaining swing back slats, making sure the outer two slats line up with the edge of the vertical back support boards.
-
Remove the painters tape and spacers from the base of the swing back slats.
Step 22: Make pattern for top curve of seat back slats.


-
Line up a large piece of kraft paper with the bottom edge of the swing back slats. Secure with painters tape.
- From the back of the swing, draw a line on the craft paper to mark the top edge of each of the swing back slats, and the outside edge of the outer swing back slats.
- Remove the paper from the swing and fold exactly in half so that the lines from the outer swing back slats line up.
- Use the lines from the tops of the swing back slats to draw a curved line from the fold down to the edge of the swing back, making sure the curved line falls just below the lines marking the tops of each swing back slat.
- Draw another line about 1/4 inch below the original curved line to ensure the cut for the curve will be below the tops of the swing back slats.
-
With the paper still folded in half, cut out the line for the curve of the swing back. This will ensure that the curve is the same on both sides of the swing back.
Step 23: Trace and cut curve of swing back.


-
Line up craft paper with the bottom of the swing back slats and secure again with painters tape.
- Trace the curve from the pattern onto the top of the swing back slats.
- Remove the paper and painters tape.
- Using a jigsaw, cut along the curved line.
- Sand the newly cut edges smooth with the random orbital sander.
OK.. SANDING ALL DONE ?? GOOD TAKE A WELL DESERVED REST AND HAVE A COLD ONE..
-
READY ? LET’S GO TO THE FINAL PHASES OF THIS PROJECT
- TAKE A DEEP BREATH..AND LET’S GET STARTED
-
Step 24: Attach arm rests to vertical support boards.

- Apply wood glue to the inside of the cut out rectangle slot on the underside of the arm rests.
- Place the arm rest on the vertical arm rest support. Place a brick on top to hold it while the wood glue is drying.
TIP: Watch for drips and wipe them up quickly. Wood glue drips may affect the uniformity of color later if you are using wood stain on your swing.
- Use a level to make sure the arm rest is straight.
- Pre-drill two evenly spaced holes through the outside of the back end of the arm rest into the vertical back support board. Insert 3 inch screws and make sure the screw heads are flush with the wood.
Step 25: Attach bolts and chain for hanging swing.


-
Using a 1/4″ drill bit, drill a hole through each of the four crosses previously drawn on the baseboards.
TIP: Prop the swing up on pieces of wood so you don’t drill into the ground when the drill bit goes through the other side.
- Insert 1/4″ x 3″ eye bolt from the top side and secure tightly with a washer and a nut on the bottom side of the baseboard. Do this for each of the four holes.
- Cut two sets of chain lengths, one 18 links long for the front bolts and the other approximately 7 feet long for the back bolts. (This second length will depend on the height of the ceiling from which the swing will be hung. If hanging from a standard 8 foot height, this length will be sufficient, and actual swing seat height can be adjusted by moving the top of the chain up or down a link or two when hanging the swing.)
TIP: If you do not have something that can cut chain links, bring these measurements with you to the hardware store, and they should be able to cut the chain to the correct lengths for you.
- Attach the shorter chain to each of the front baseboard eye bolts using a quick link. Attach the longer length of chain to the back baseboard eye bolts using a quick link.
-
Count 21 links from the back baseboard bolt (including the quick link) and attach the front chain to the back chain at this point using a quick link. Do this on both sides of the swing.
Step 26: After the swing is hung, insert screw eye into arm rest and attach to chain.

Because the chains attach at the base of the swing, if the back chain isn’t secured further, the swing can easily tip backward if children are climbing on it. Wait until the swing is hung to determine where the chain must be secured.
- While the swing is hanging and not moving, mark the point where the back chain passes the arm rest.
- At that mark, pre-drill a hole using a 1/8″ drill bit, and insert a large screw eye.
- Connect the chain to the screw eye using a quick link.
- Repeat for the back chain on the opposite side.
Step 27: Stain or paint the swing. (Make sure it’s weatherproof!)

Time to paint or stain the swing!
TIP: I found this easier to do while it was hanging, but you may choose to complete this step BEFORE hanging the swing.
- If painting AFTER hanging the swing, use painters tape to cover bolts and chains that may get paint on them.
- Using your choice of wood stain or paint (make sure it’s weatherproof!), cover all wood surfaces thoroughly.
-
Let it dry completely before using the swing.
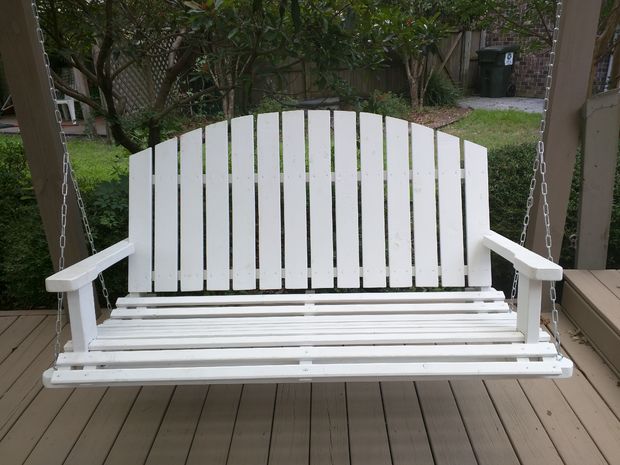
Step 28: RELAX in your new porch swing.

It’s time to kick back and chill on your new porch swing, content with the fact that you’ve worked hard and saved yourself a couple hundred dollars.
OR, you can go get started on a SECOND swing, because there is no room left on the first one!
Our Thanks To Instructables
Article and Instructions Source : Instructables
Picture Source: Instructables